You've got your passport beside the laptop, your travel plans are taking shape, and the BLS calendar still isn't showing a usable appointment. Then you realise your partner may need a separate slot, the portal rejects your password, and the date you just selected disappears before you finish.
For appointment booking, BLS applicants need more than a document checklist. They need the correct centre and visa category, a workable household booking plan, and an account that's ready when availability appears. This guide focuses on Spain visa appointments in California, while keeping a firm distinction between instructions you can verify on the official portal and applicant reports that aren't guarantees.
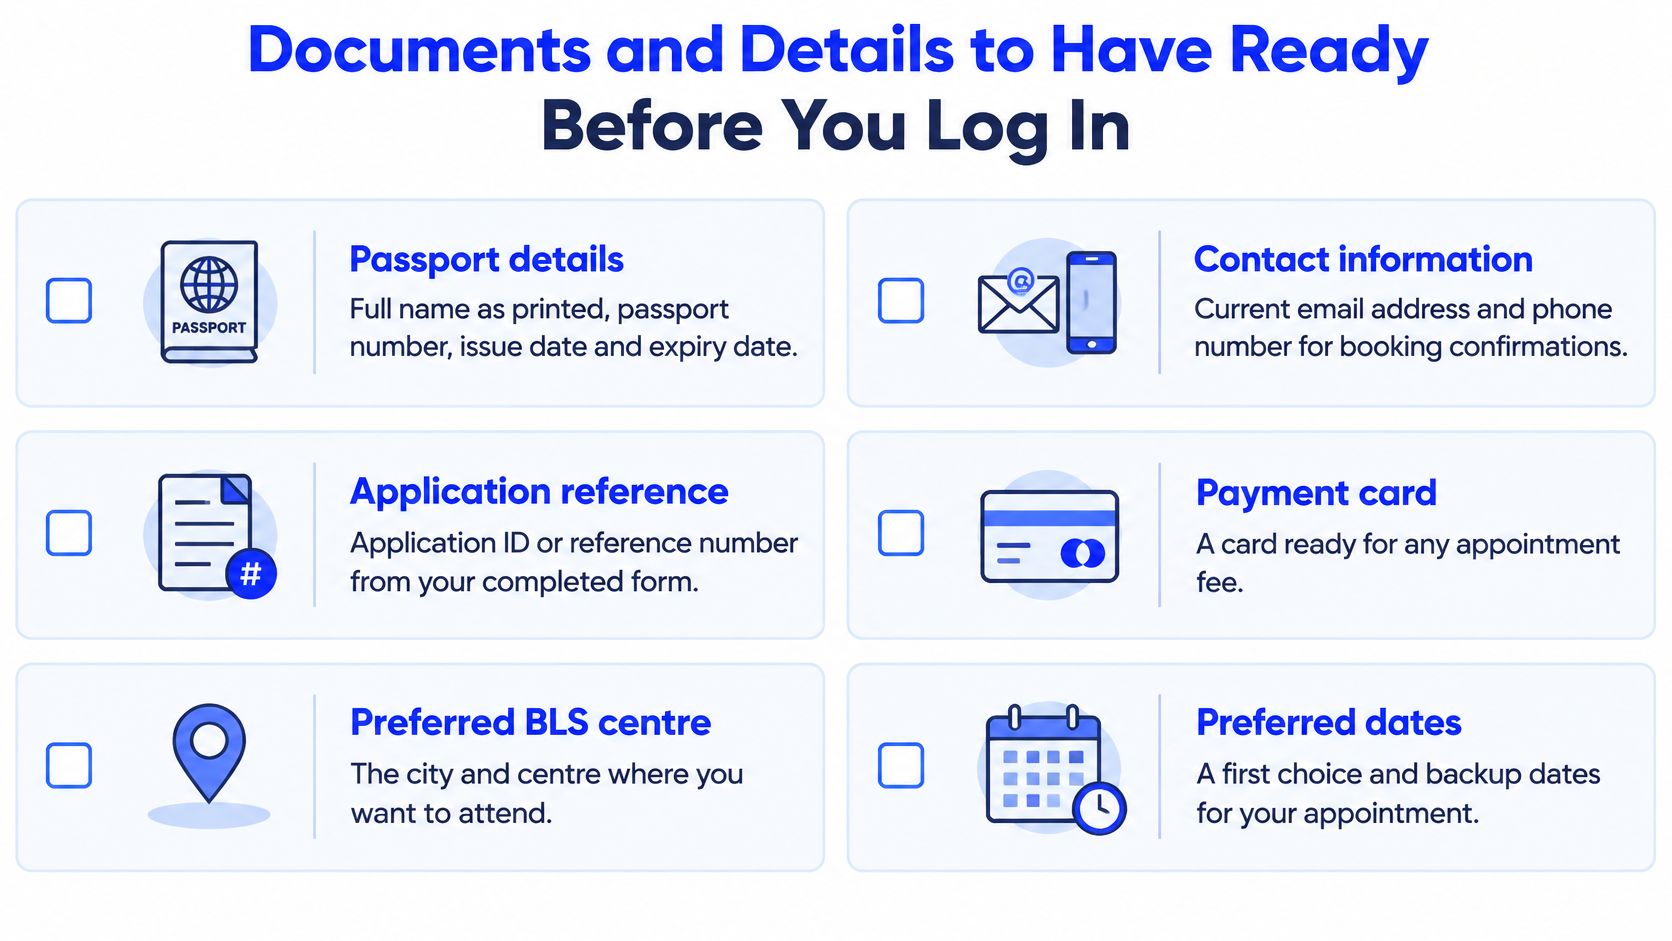
Documents and Details to Have Ready Before You Log In
Prepare a booking folder before opening the calendar. You want to copy checked information into the portal, not search through email attachments while trying to hold a slot.
Your pre-login checklist
- Passport details: Record your full name as printed, passport number, issue and expiry dates, and date of birth, with a clear scan of the biographical page for comparison.
- Visa category and purpose: Write down the category you intend to apply under and your reason for travel so you don't select an appointment for a different service.
- Planned travel date: Keep your intended departure date visible, but don't treat it as evidence that the centre can accommodate your timetable.
- Contact information: Use an email account you can access reliably, a mobile number that receives texts, and your current postal address.
- Application reference: Have your application ID or reference available if your chosen booking process asks for it.
- Separate applicant files: Prepare a distinct record for every spouse, child, or other applicant, even if you hope to attend together.
- Passport validity check: Compare each passport's expiry date with the current requirements for your visa category, including any required validity after the planned stay.
- Centre and backup dates: Record the centre you're eligible to use and acceptable appointment dates before entering the calendar.
- Payment readiness: Have a suitable card available if the official portal requires payment, without assuming that every appointment type carries the same charge.
Keep the visual checklist beside your applicant files.
Keep preparation separate from eligibility
Use a dated checklist to mark what's ready and what still needs verification. Store passport scans securely rather than leaving them in a shared downloads folder.
For a separate UAE employment-visa process, the Goodhand employment visa readiness guide is a useful preparation resource, but it doesn't establish Spanish visa requirements.
Compare every submitted field against the passport. A transposed passport digit or swapped day and month can create a mismatch that may require centre assistance or rebooking.
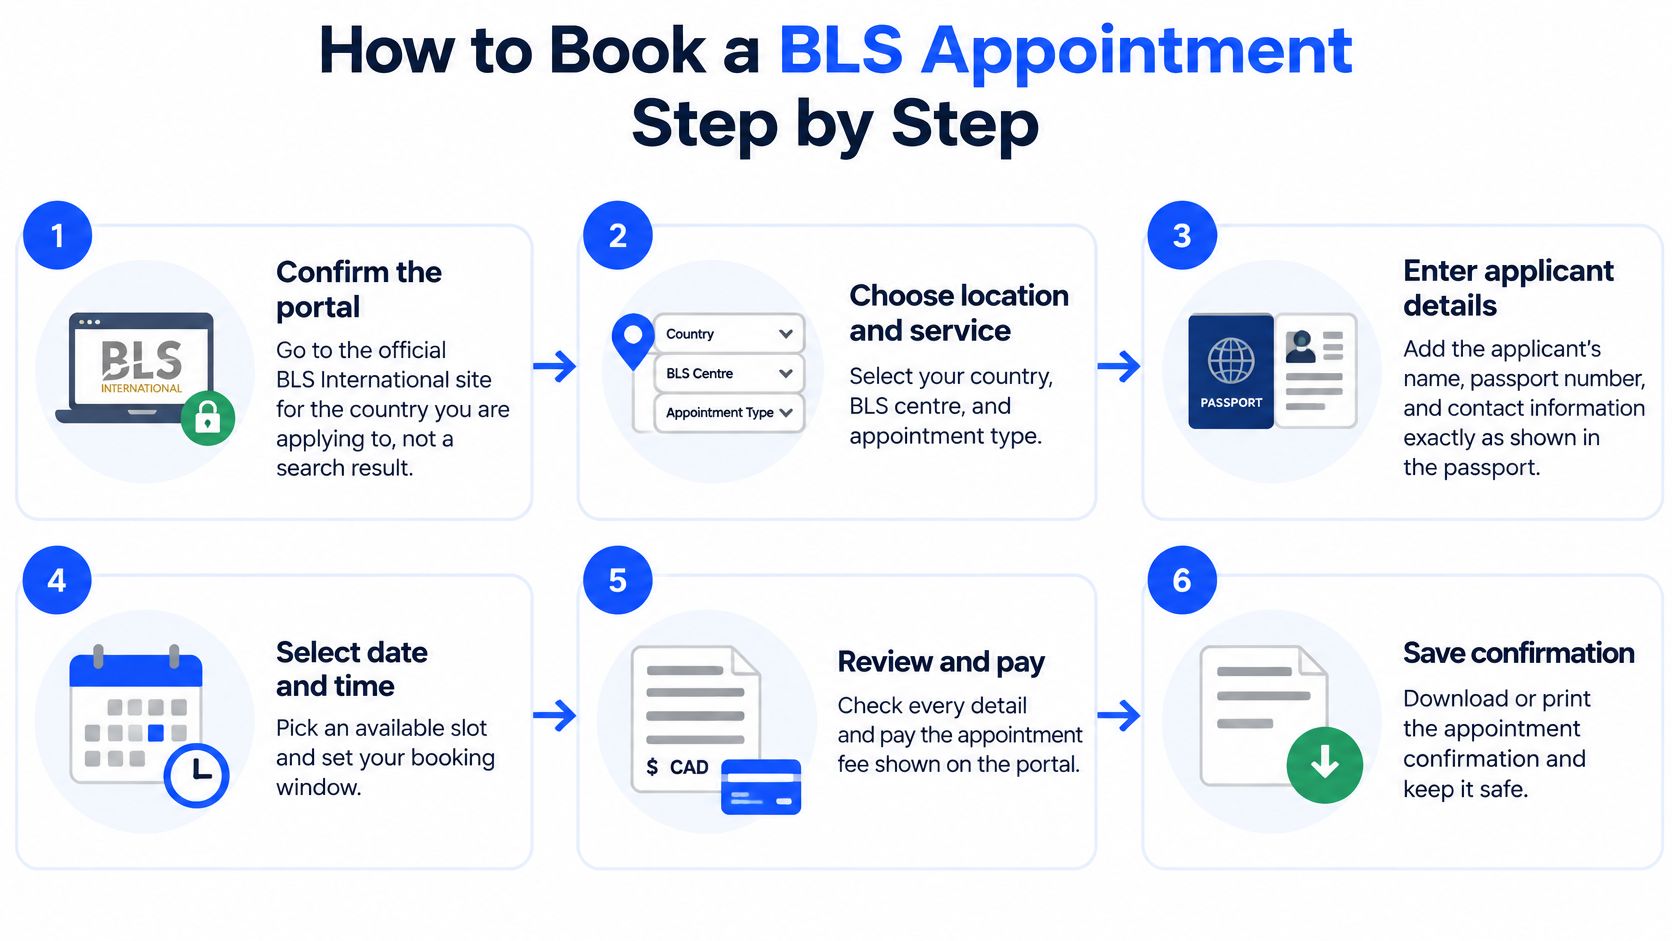
How to Book a BLS Appointment Step by Step
Confirm the portal. Start from the relevant consulate's official visa information and follow its appointment route to the appropriate BLS International country site. Don't assume a search advert or third-party booking page is the official route; BLS CPR training is an unrelated booking process.
Choose the correct location and service. Check the jurisdiction instructions before selecting San Francisco or Los Angeles, then verify that the centre accepts your visa category. A convenient city isn't necessarily an eligible alternative.
Create or access your account. Use the email address you'll retain throughout the application, and complete any verification the portal requests. Save the credentials in a password manager rather than relying on memory during a slot search.
Enter the applicant information. Match the passport spelling and number, and inspect the date format before entering a birth date. Where the portal offers an applicant-count field, follow its displayed instructions rather than assuming everyone can attend under the lead applicant's booking.
Choose the category and available appointment. Select the service that matches your application, then choose an acceptable date and time. Review the applicant, centre, service and any payment request before submitting; don't switch categories because another calendar has openings.
Save the completed confirmation. Download or print the appointment record and check its date, time and centre address against your calendar. Keep any booking reference and payment receipt with the relevant applicant's documents.
Use this process graphic as a navigation aid, not a substitute for the instructions displayed by your particular portal.
Recognise a finished booking
A selected calendar time isn't enough. Look for a completed appointment record with the correct applicant and service, retain the reference number, and save the confirmation email when it arrives. File a printed copy for attendance if the centre's instructions require it.
Practical rule: Don't close the session until you've saved evidence of the completed booking.
Keep visa submission and later residence administration separate. If you're also arranging Spanish residence formalities, Bsure Health Brokers offers help with TIE paperwork and health cover; a TIE appointment isn't interchangeable with a BLS visa appointment.
The video below offers an additional walkthrough to compare with the screens you encounter. Follow your live portal when its options differ.
Before logging out, assign each confirmation to the correct applicant folder. A household organiser should be able to identify who is booked, where they're attending, and which applications still need an appointment without reopening every attachment.
Booking for Families and Multiple Applicants
Slots needed by applicant scenario
| Scenario | Slots needed | Reported rule | What to check |
|---|---|---|---|
| Single applicant | One individual slot | One applicant per slot as a planning assumption | Confirm the centre handles your visa category |
| Family of four, San Francisco account | Four separate slots, according to the SpainGuru applicant account | One application per appointment | Book each slot as it appears; the slots may fall in different months |
| Couple, Los Angeles account | One family slot, reported rather than confirmed | One family appointment may cover both spouses | Confirm with the centre before assuming this applies to you |
These are applicant-reported arrangements, not a universal BLS family policy. The contrast matters because preparing everyone's documents doesn't resolve how the centre expects you to reserve attendance.
An individual-slot arrangement lets you secure appointments as openings appear, but it can split the household across dates. A shared family appointment is easier to coordinate only when the centre explicitly accepts it for your category and family circumstances.
Decide before the calendar opens
- Verify the arrangement: Check the centre's published family-booking instructions, or request clarification that identifies your category and the applicants' relationships.
- Count the required reservations: Separate the number of people applying from the number of appointments the centre authorises.
- Choose the booking order: Prioritise the applicant with the least flexible attendance date, unless the centre gives instructions about the principal applicant and dependants.
- Record each completed reservation: Maintain a household sheet showing applicant name, service, centre, appointment date and booking reference.
- Test the whole travel plan: Assess whether the last household appointment still leaves a workable path to the intended departure.
Don't cancel a usable appointment merely to pursue adjacent family slots unless you understand the cancellation and replacement process. You could lose confirmed attendance without securing a better arrangement.
A family booking is complete when every applicant has the reservation the centre requires, not when the lead applicant receives a confirmation.
Prepare for the practical consequences of split dates too. Decide who can accompany children, who needs time off work, and whether separate journeys are affordable before accepting scattered appointments.
Fixing Lockouts, Failed Sign-Ins and Site Errors
A lockout just before availability opens is more damaging than an inconvenient page layout. Stop repeated sign-in attempts when access fails and diagnose the account problem before trying again.
Applicant accounts describe both lockouts following failed sign-ins and browser problems resolved by changing browsers or clearing cookies. Those experiences suggest useful troubleshooting options, but they don't establish a published BLS recovery policy.
Booking symptoms, likely causes and fixes
| Symptom | Likely cause | Fix |
|---|---|---|
| Account locked after repeated sign-ins | Too many failed logins, reported just before a slot release | Stop retrying, use the site's recovery route, then log in once access returns |
| Pages loading wrongly or stuck | Stored cookies or a browser conflict | Clear cookies or switch to another browser, as an applicant account described |
| Slot disappears during booking | Another applicant may have taken the same time | Pick the next available time instead of refreshing repeatedly |
| No confirmation email | Wrong email entered or message filtered as spam | Check spam, then contact the centre with your reference number if you have one |
Recover without making the problem worse
For an account problem, check that you're using the correct country portal and username before requesting a password reset. Follow any lockout message rather than assuming another browser will remove an account-level restriction.
For a browser problem, save any completed confirmation first. Clearing site cookies can end your session, so don't use it casually while an unfinished booking or payment is processing.
A missing email requires a different check: inspect your account for a completed appointment before making another reservation. If you contact support, provide the applicant's name, service, reference and a redacted error screenshot, but never your password or card details.
The Smart Classic guide to status checks offers a separate administrative reference for tracking applications; it isn't a BLS account-recovery channel.
Browser troubleshooting is something you can try yourself; account restoration and booking validity may require the centre. Only current portal instructions or a direct centre response can confirm the remedy for your specific case.
Finding a Slot and Setting Your Booking Window
A clear calendar today does not guarantee the same options tomorrow. For California centres, the section's source reports a San Francisco estimate, but gives no wait figure for Los Angeles. Treat the San Francisco figure as an applicant report, not a current service commitment or official average.
Reported wait times for BLS appointments in California
| City or account | Reported wait | Source type | Notes |
|---|---|---|---|
| San Francisco | About five weeks from booking to the first available appointment | Applicant report summarised in the California-to-Spain report | A reported estimate, not an official average |
| Los Angeles | No city-specific figure reported | No reported estimate | Check the centre's calendar for current availability |
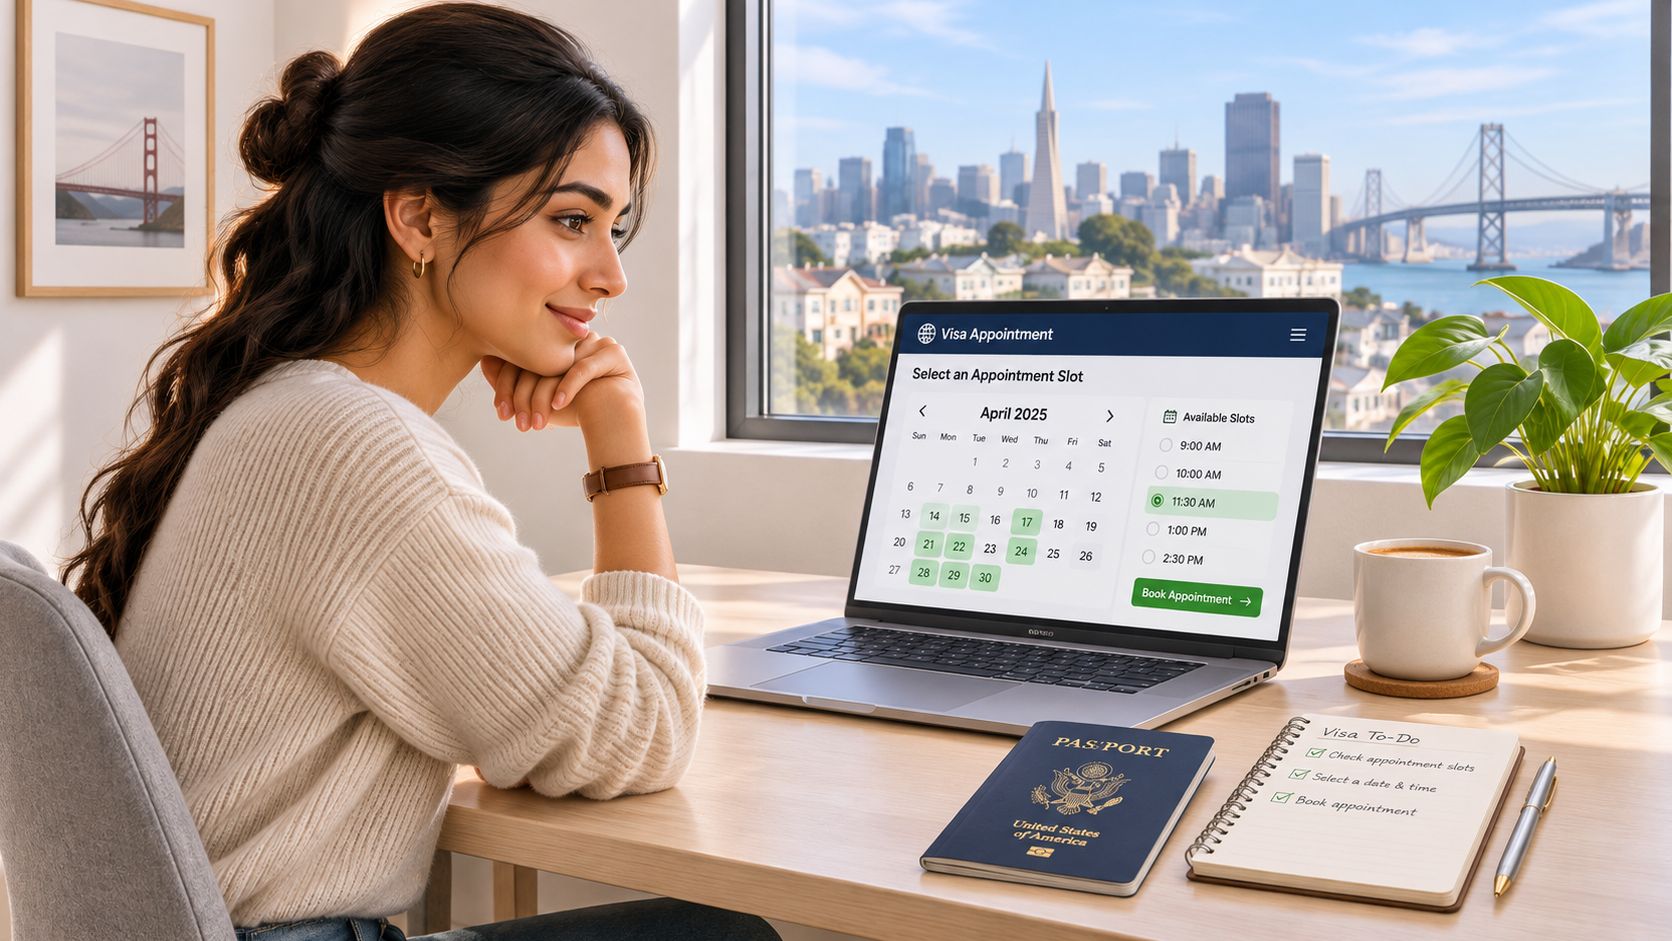
Time spent searching for a slot is separate from the wait between booking and attendance. A first-available date does not show how long applicants searched before finding it. Appointment availability also says nothing about how long visa processing or passport return may take.
Build a timeline without false precision
Work backwards from your intended departure date, keeping three uncertainties separate: the appointment search, the time from booking to attendance, and the visa process after the appointment.
Use a planning worksheet:
- Target travel date: The departure you are assessing, not a date the centre has accepted.
- Post-appointment allowance: Current processing and passport-return guidance for your category.
- Appointment lead-time assumption: A clearly labelled estimate based on relevant, recent observations.
- Search and recovery buffer: Room for an empty calendar, account issues, family coordination or rebooking.
- Search-start target: The date left after those allowances, subject to the official application window.
Call the result a planning target, not a guaranteed safe date. If it falls before applications are permitted, revisit the travel plan rather than trying to bypass the application window.
For families, test the timeline against the attendance date of the last required applicant. One person securing an early slot does not mean the household can attend together.
Read the calendar without assuming a release schedule
Applicant reports describe slots appearing in batches and increased pressure during student-visa periods. A blank calendar is only a snapshot of what is available at that moment; it does not establish a release pattern.
Do not rely on an unofficial claim about a regular release hour unless the centre publishes that instruction. Keep a simple log of the centre, visa category, search date, dates offered and outcome. Recording an empty calendar helps you track your own search without treating another applicant's experience as a promise.
Choose a sustainable checking routine
Check at times you can maintain, and keep your account credentials ready. Repeated refreshing will not fix a category mismatch, account restriction or ineligible centre choice.
If the first available appointment is outside your workable travel window, consider these options:
- Broaden attendance dates: Adjust work or travel arrangements if a different appointment becomes usable.
- Check another centre: Confirm jurisdiction and category eligibility before considering another city.
- Reassess departure: Change the intended journey rather than assuming that submitting an application guarantees a timely decision.
- Keep relevant records: Save centre instructions and completed confirmations, not only screenshots of slots you have not reserved.
Settle the household's attendance requirement and establish a checking routine. Update your timeline when the calendar changes or the centre provides official guidance. A usable, eligible appointment is more valuable than an ideal date you have not secured.
Book the first slot you can get, then build the rest of the plan around it.
For local businesses managing their own appointment calendars, Heyline provides an AI phone receptionist that answers calls, checks availability and books directly into Google Calendar. Visit Heyline to explore phone-based booking for your business. Heyline does not access BLS calendars or reserve visa appointments.